

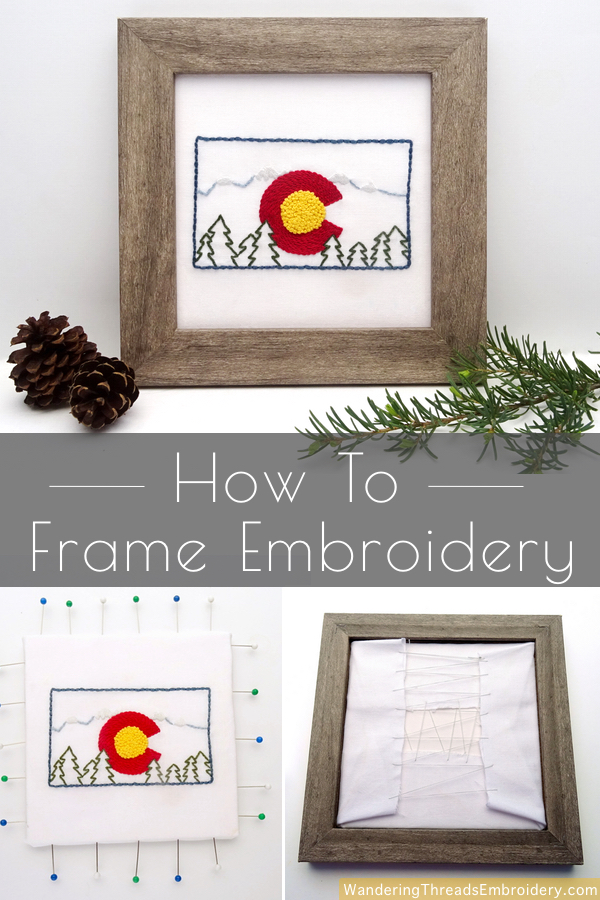
How to Make Embroidery Frame at Home
How to Make Embroidery Frame at Home
If you find yourself falling brusk at the end of an embroidery project because framing sounds intimidating… I am hither to help! Learning how to frame embroidery is not as intimidating as information technology sounds. A few basic materials and near 20 minutes of your fourth dimension are all you need to turn that embroidery piece you spent hours stitching into a finished masterpiece.
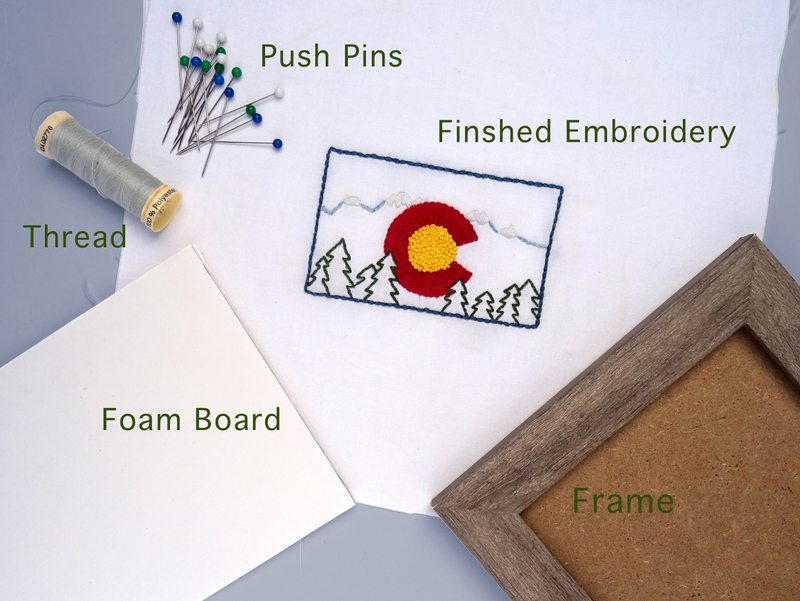
You Will Need…
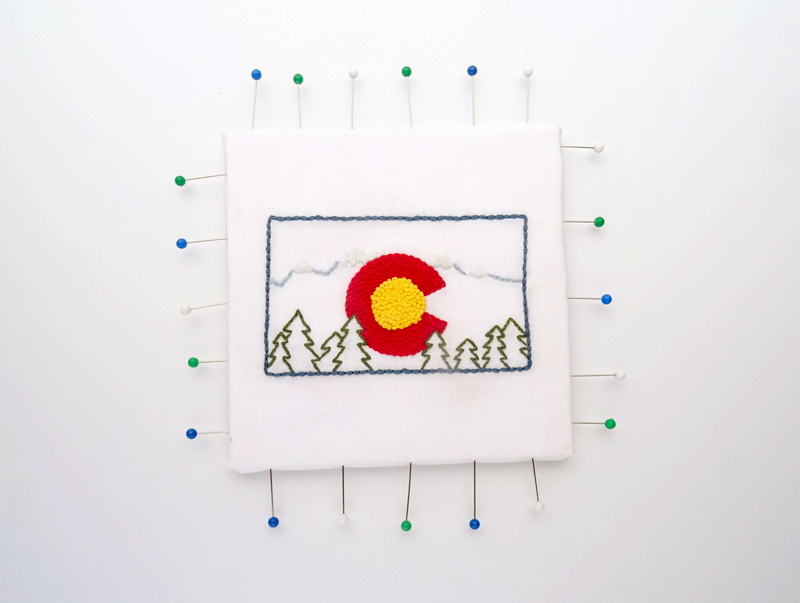
- Your Finished Embroidery Slice – washed & pressed. The cloth must be big plenty to fill the frame with 2 or three-inches of extra material for wrapping around the back. If yous're like me and trim your fabric while it'south in the hoop to proceed it out of the style, be sure to exit actress if you program to frame the finished piece.
- A Picture Frame large plenty to fit your embroidery. This tutorial does non utilise the glass forepart of the frame. For artful reasons, I adopt the stitching without glass in front of it, and for practical reasons, it can harm the thread over fourth dimension. Nonetheless, if you choose to have drinking glass on the front, you will need to use a deep, shadowbox type frame and spacers and then the embroidery does not touch the drinking glass.
- A Foam Board* cut to fit the inside dimensions of your frame. Cut the board about a 1/8-inch smaller than the within measurements to business relationship for the fabric that volition be wrapped around the edges. *If you don't desire to purchase a large posterboard size piece of cream board, ask at your local framing shop if they take any small remnants.
- Sturdy Cotton Thread
- Push Pins
How to Frame Embroidery
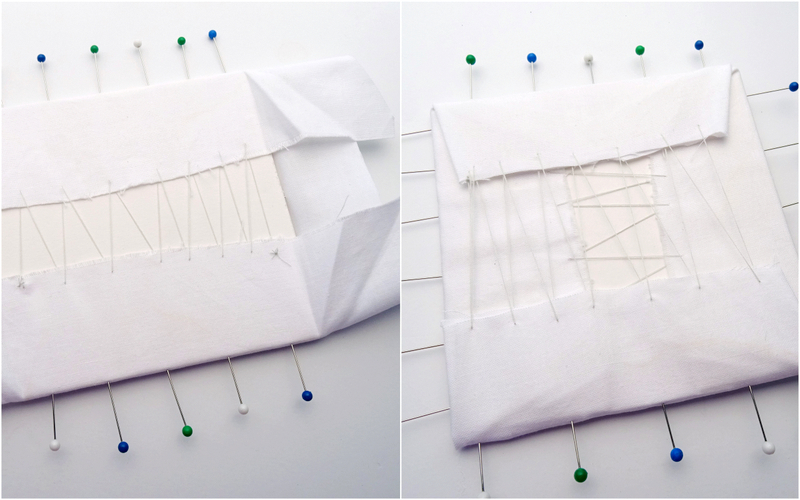
Once yous have gathered and prepared all your materials, begin the framing process by positioning the cream board in the center of your embroidery slice. Make sure it'due south direct! Carefully flip it over and then the material is on the bottom. Starting with the long sides, fold the extra material into the center. If necessary, trim the fabric to leave a roughly 1-four-inch space in between. Pull the fabric tight and secure by pushing the pins into the foam lath.
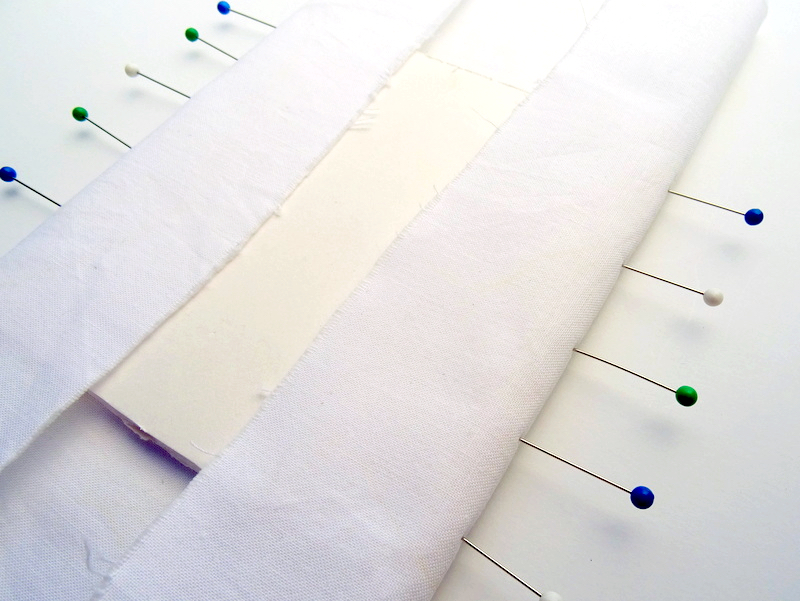
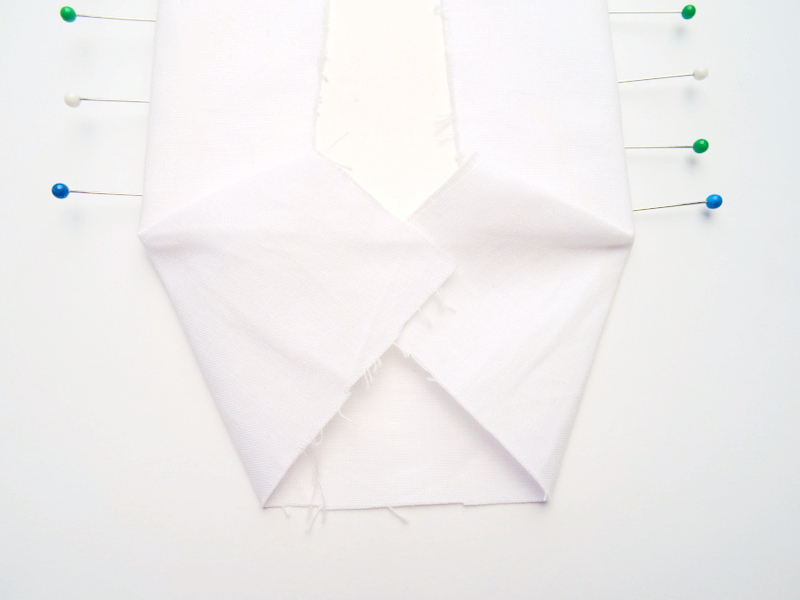
Repeat this process on the short sides. Depending on the shape of your frame, you might need to fold the corners on a diagonal and trim the material to prevent it from bunching. The finished fabric-wrapped foam lath will need to fit snuggly inside the frame and then try your all-time to avoid bulky corners.
One time the fabric is secured onto the board, flip it over and practice a concluding check to make sure information technology is straight.
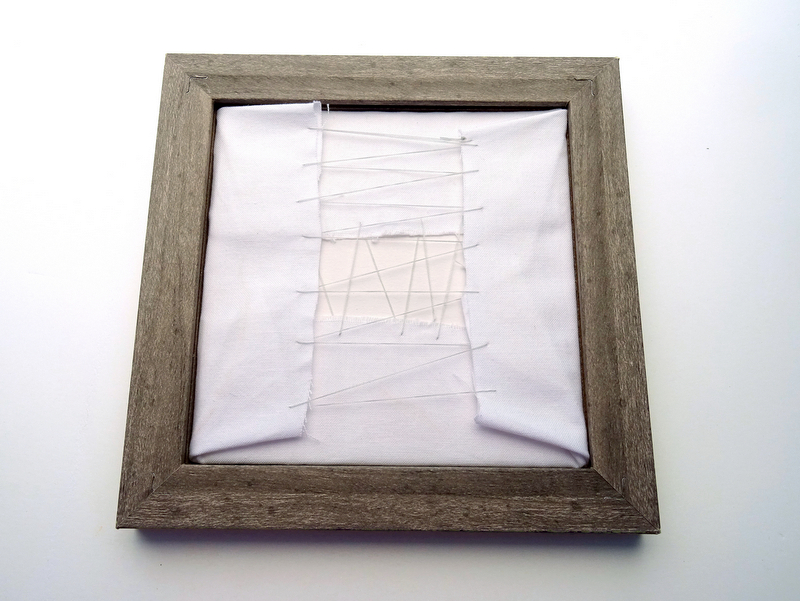
The last footstep is stitching the textile together on the back using a simple lacing technique. Commencement by flipping the extra material from the short sides out of the mode. Insert a needle with a long strand of thread nigh a one/4-inch from the border of the fabric and weave back and forth while pulling the fabric tight. Tie off the thread at the end and start a new piece. Stop the lacing by folding the material from the short sides back over into the centre and lacing it together.
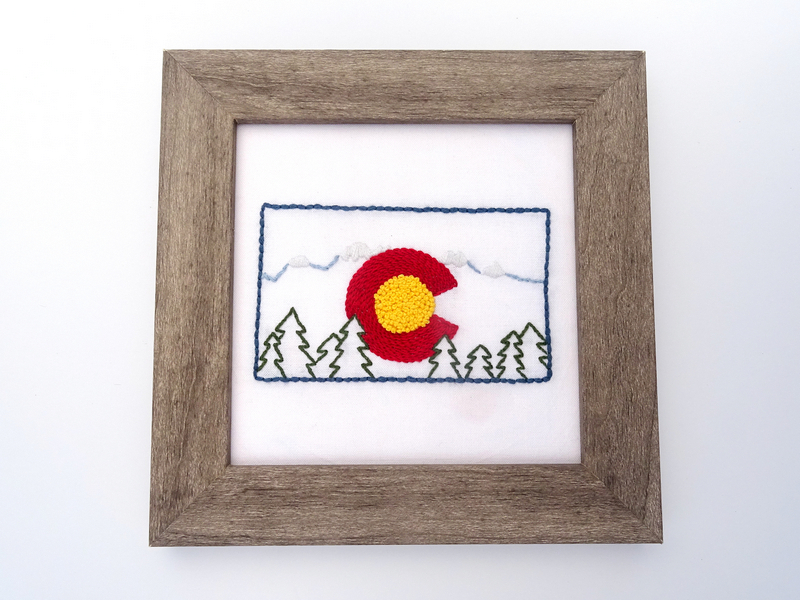
Remove the pins and the fit the embroidery board inside the frame.
Supplant the frame bankroll, flip it over, and admire your handiwork!
Expect, There'due south More!
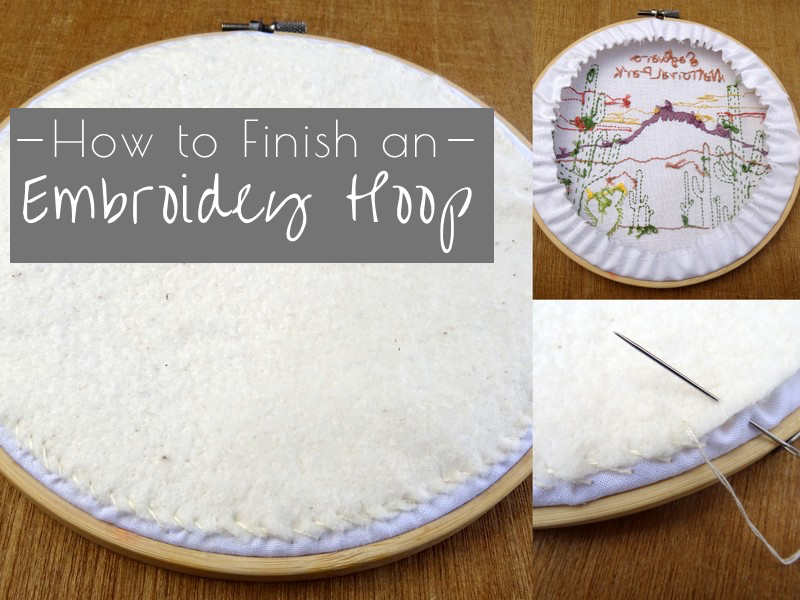
Want to learn how to frame embroidery within the hoop? That trusty wooden hoop you used for stitching can also serve as a fantastic frame. Acquire how by visiting my mail service: How to Finish an Embroidery Hoop.
Stitch Life Frames
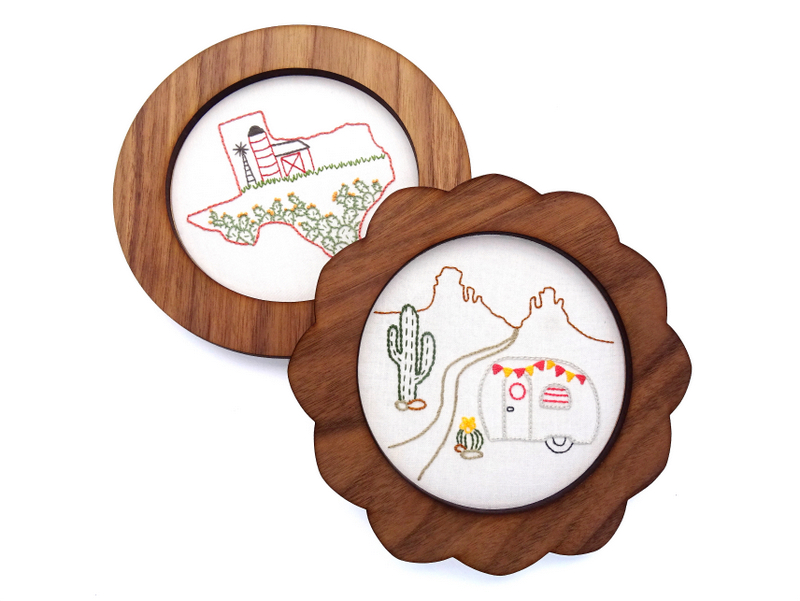
Finally, if all of the folding, stretching and lacing sounds similar too much work…how about something easier? These solid wooden frames made by Sew together Life Studio are by far the simplist, virtually visually appealing embroidery framing pick I accept come beyond.
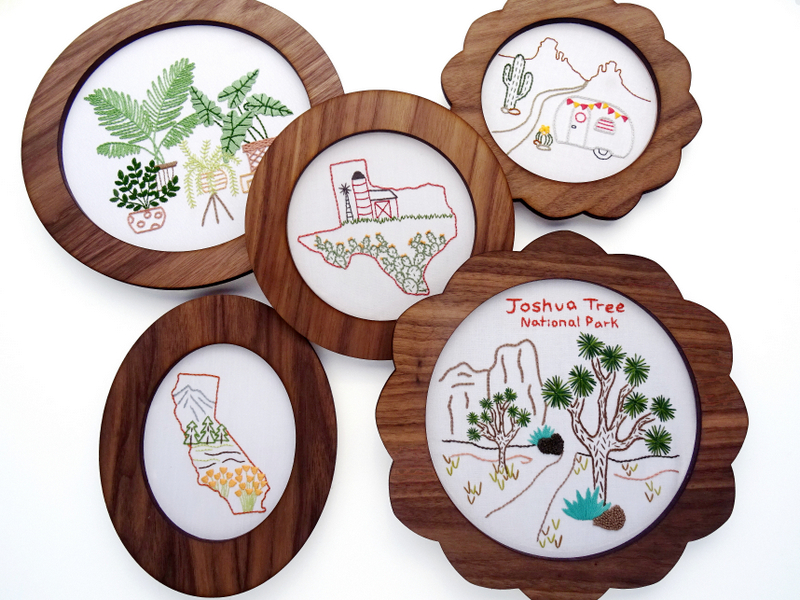
Available in a range of styles, shapes, sizes and finishes, these paw crafted frames permit y'all to simply sideslip your finished embroidery piece – hoop and all – backside the frame where it is secured in place with rubberband bands.
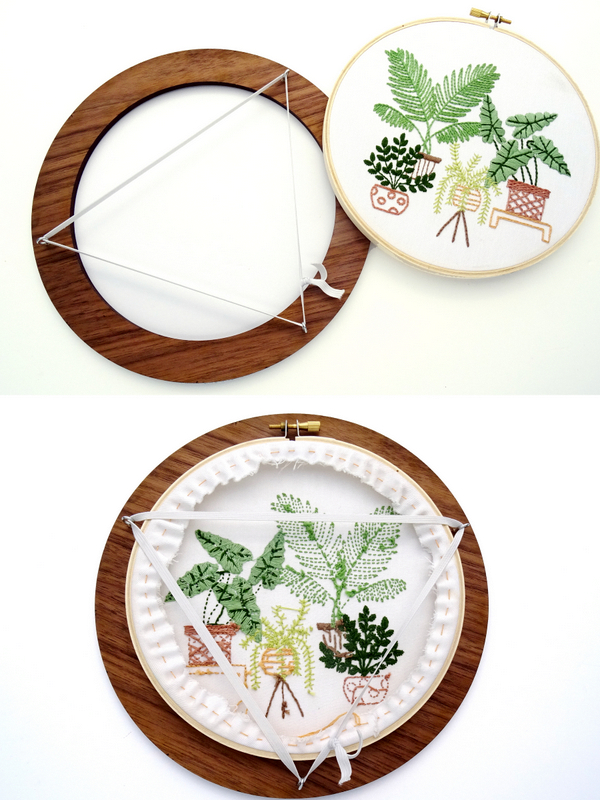
Flip information technology over, accommodate the placement, and viola, you lot accept a perfectly framed piece of embroidery art! Yous tin view all of the frame options by visiting Sew Life Studio on Esty.
Happy Stitching!
How to Make Embroidery Frame at Home
Posted by: parkergingive.blogspot.com
0 Response to "How to Make Embroidery Frame at Home"
Post a Comment